genuinequality

Download free music MP3s on genuine quality, the world’s largest online music catalogue, powered by your scrobbles. Free listening, videos, photos, The world’s largest online music catalogue, powered by your scrobbles. Free listening, videos, photos, stats, charts, biographies and concerts. stats, charts, biographies and concerts.

Saturday, June 15, 2024

Pico MIDI “Pack” PCB Design

This is a PCB version of my Raspberry Pi Pico MIDI "pack" Interface - something I've been meaning to do for ages! Warning! I strongly recommend using old or second hand equipment for your experiments.  I am not responsible for any damage…
Read on blog or Reader
Site logo image Simple DIY Electronic Music Projects Read on blog or Reader

Pico MIDI "Pack" PCB Design

Kevin

June 15

This is a PCB version of my Raspberry Pi Pico MIDI "pack" Interface - something I've been meaning to do for ages!

Warning! I strongly recommend using old or second hand equipment for your experiments.  I am not responsible for any damage to expensive instruments!

If you are new to microcontrollers, see the Getting Started pages.
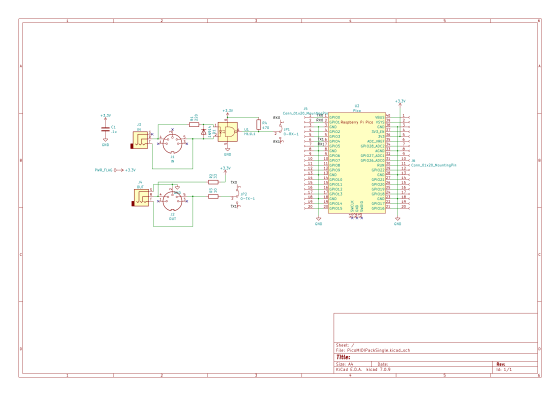
The Circuit

This is exactly the same circuit as used with my previous Pico MIDI interfaces, but I'm using solder bridges to select between UART 0 or UART 1. It also has the option of using either 5-pin DIN or TRS sockets. It is wired for "type A" TRS MIDI (as per the MIDI specification).

There is no protection on the MIDI OUT side, so if a dodgy cable is plugged in, or something is connected that draws too much current from the Pico, there is nothing to stop it. But there won't be space for a buffer, and given the cost of a Pico, I'm not worrying about it.

PCB Design

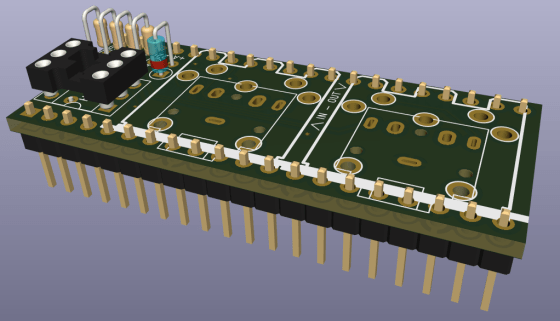
The absolute key, and really the whole point of doing this PCB, was to fit the circuit and two DIN sockets within the footprint of the Raspberry Pi Pico.

I've taken inspiration from the Adafruit MIDI Feather Wing I've used in the past, but the issue here is that the Pico is one 2.54mm hole spacing less than the Feather. I really wasn't sure it would fit.

I also didn't want to have to move to surface mount components if I didn't have to, but thankfully the Pico is longer and if I mount the resistors and diodes vertically then it all just about fits.

I've had to allow for a capacitor for the H11L1 on the underside of the board as there just wasn't any more room!

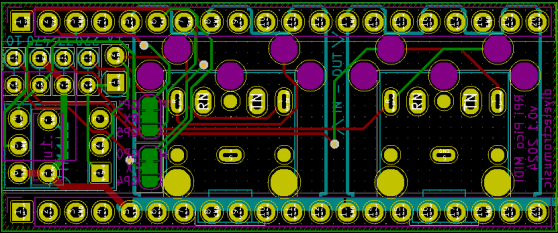
I also couldn't squeeze in pin-jumpers, so I've gone for solder-bridge jumpers to select between the UARTs. I've opted for a default setting of UART 0 on GP0/1 with a trace to be cut and re-soldered to switch to UART 1 on GP4/5.

Closing Thoughts

I don't quite know why I've taken so long to do this! I did have a couple of aborted attempts in the past, but each time gave up when it just didn't seem like it would all fit. I even toyed with the idea of a Feather to Pico converter, but again the difference in pin spaces just didn't quite work for me.

I'm really pleased with how this appears to have come together.

Kevin

Comment
Like
You can also reply to this email to leave a comment.

Simple DIY Electronic Music Projects © 2024. Manage your email settings or unsubscribe.

WordPress.com and Jetpack Logos

Get the Jetpack app

Subscribe, bookmark, and get real-time notifications - all from one app!

Download Jetpack on Google Play Download Jetpack from the App Store
WordPress.com Logo and Wordmark title=

Automattic, Inc. - 60 29th St. #343, San Francisco, CA 94110  

Posted by BigPalaceNews at 10:07 AM
Email ThisBlogThis!Share to XShare to FacebookShare to Pinterest

No comments:

Post a Comment

Newer Post Older Post Home
Subscribe to: Post Comments (Atom)

Search This Blog

About Me

BigPalaceNews
View my complete profile

Blog Archive

  • June (130)
  • May (82)
  • April (84)
  • March (87)
  • February (90)
  • January (74)
  • December (72)
  • November (95)
  • October (105)
  • September (112)
  • August (116)
  • July (96)
  • June (100)
  • May (105)
  • April (95)
  • March (131)
  • February (111)
  • January (104)
  • December (98)
  • November (87)
  • October (126)
  • September (104)
  • August (97)
  • July (112)
  • June (113)
  • May (132)
  • April (162)
  • March (150)
  • February (342)
  • January (232)
  • December (260)
  • November (149)
  • October (179)
  • September (371)
  • August (379)
  • July (360)
  • June (385)
  • May (391)
  • April (395)
  • March (419)
  • February (356)
  • January (437)
  • December (438)
  • November (400)
  • October (472)
  • September (460)
  • August (461)
  • July (469)
  • June (451)
  • May (464)
  • April (506)
  • March (483)
  • February (420)
  • January (258)
  • December (197)
  • November (145)
  • October (117)
  • September (150)
  • August (132)
  • July (133)
  • June (117)
  • May (190)
  • January (48)
Powered by Blogger.